Showing posts with label Ingredients. Show all posts

Saturday, November 3, 2012

Fall Spinach Salad

Fall into Spinach

Leftover night! Our attempt to clean out the fridge before Sunday Fun Day! And yes, Sunday Fun Day is my favorite day of the week, because it usually means going to the Farmer's Market and grocery store, then cooking all day! Oh and not to mention, football!

Fall Spinach Salad | www.kettlercuisine.com

But, I digress. So, we were eating leftovers and I decided to use the remaining fresh spinach for a side salad to accompany the leftover soup (for me) and pasta (for him). I literally did not have any dressing in our fridge, so decided to make my own. A little homemade dressing, a little nuts and dried fruit and this became a "throw together" that turned into a delicious salad, especially for the Fall.

We devoured the salad so fast, that I didn't take a picture. So I woke up the next morning and remade it. 

Fall Spinach Salad | www.kettlercuisine.com

Ryan is a Ranch-lover, we all know this. I have been on a mission to create (or buy) other dressings that he will equally love. This was one such success. The key for Ryan is to create a creamy texture that mimics the thickness and richness of ranch. However, I am not a fan of the fat content that accompanies ranch dressing. So I improvised a bit. Yes, I do add a little bit of mayonnaise to this dressing, but only in moderation to get the texture. I have to face the fact that Ryan will never stop eating Ranch, but if I can get him to use it less, then I consider that an accomplishment!

This is a very easy and quick salad, especially in the fall, when apples are crisp and abundant in most kitchens.

Fall Spinach Salad | www.kettlercuisine.com

Fall Spinach Salad

Yields: 4 salads
Prep Time: 10 minutes 

2 cups fresh spinach
1/2 cup apple, julienne (we use Honeycrisp)
1/3 cup raisins (can use dried cranberries, cherries or currants as well)
1/2 cup raw walnuts, toasted, chopped (can use hazelnuts or pine nuts here too)
Sharp cheddar or Gruyere cheese, grated or chopped into small squares

2 tablespoon cup mayonnaise
3 tablespoon  honey
2 tablespoon white balsamic vinegar (or white wine vinegar)
1/3 cup olive oil
salt and pepper

Fall Spinach Salad | www.kettlercuisine.com

For the salad, place spinach on a small plate and equally distribute the apple, walnuts, raisins and cheese among the plates. 

In a small bowl, whisk together the mayonnaise, vinegar, honey and salt and pepper. Slowly add in the olive oil, while whisking. 

Drizzle the dressing over the salad and serve.

Friday, October 12, 2012

Pumpkin Recipe Roundup: Pumpkin Almond Granola

It's time for another installment of my October series: Pumpkin Recipe Roundup. For week 2, I have decided to share my pumpkin granola recipe. I eat granola almost every day with Greek yogurt for breakfast. I started making my own granola recently to control the amount of sugar and to make gluten free. I followed a recipe the first time I made granola and was amazed at how easy it is. After messing with ingredients, measurements and cooking times/lengths, I have created, what I believe is a foolproof recipe that the hubby enjoys too!

I usually double the recipe since we eat a lot of granola in our house. It will keep in an air tight container (recommend a glass jar instead of Tupperware) in the pantry for about 3-4 weeks. This recipe is VERY versitle, so play around with ingredients that you like to make the perfect personalized granola. The pumpkin flavors are great for this lovely Fall season we are having! Num, num, breakfast is served :)

Pumpkin Almond Granola | www.kettlercuisine.com


Pumpkin Almond Granola

Adapted from The Sprouted Kitchen
Yields: 6 cups
Prep Time: 10 minutes
Cook Time: 25-35 minutes

5 tablespoons extra virgin olive oil
1 teaspoon kosher salt
2 teaspoons pumpkin pie spice
1/4 teaspoon fresh grated nutmeg
1/4 teaspoon ground cinnamon
1/3 cup pure maple syrup
1 cup pumpkin puree
4 cups old fashioned rolled oats (can use gluten free oats)
2 cups mixture of raw walnuts, almonds, flax seed and/or pepitas
1 cup mixture of dried figs, cranberries and currants (can use any dried fruit here)
1/2 cup shredded unsweetened coconut (optional)

Preheat the oven to 350F. Line a large walled baking sheet (or two if doubling) with either parchment paper or aluminum foil. Spray with olive oil (or use a paper towel dipped in olive oil to rub the surface). This helps the granola from sticking while cooking.

Pumpkin Almond Granola | www.kettlercuisine.com

In a medium saute pan over medium heat, toast the nuts and seeds (except flax seed) until fragrant and lightly browned. Stir these often while toasting and watch carefully as they will burn very quickly. Once toasted, set this aside to cool.

Pumpkin Almond Granola | www.kettlercuisine.com

In a large bowl, mix the olive oil, salt, spices, maple syrup and pumpkin puree until well blended. Stir in the oats, toasted nuts and seeds and mix well to combine. The mixture will be very moist, this is OK.

Pumpkin Almond Granola | www.kettlercuisine.com

Lay the granola out on the prepared baking sheet (or two) and spreed out evenly. Bake at 350F for 25-35 minutes or until the granola is a nice golden brown, stirring every 10 minutes to let steam escape. Steam will rise from the granola when you stir - this is a good thing and helps make the granola crispy! Remove from the oven and stir in the dried fruit right away. Let cool to room temperature and store in an air tight container in the pantry for up to 3-4 weeks. For a chewier granola, cook closer to 20-25 minutes. For a crispier granola texture, cook for 30-35 minutes. I like crispy!

Pumpkin Almond Granola | www.kettlercuisine.com

Monday, October 8, 2012

A Well Stocked Pantry

Hi, I'm Jessica, and I am addicted to grocery shopping!

It was brought to my attention by my dear friend Ruth, that not everyone has a ridiculously-stocked pantry and refrigerator like I do. I will be the first to admit that I have a grocery shopping problem, but it helps fuel my hobby to create in the kitchen. Ruth took this one step further and asked for me to put together a list of "must haves" for my pantry, fridge and freezer. How can I turn that kind of request down!!

It is important to mention that everyone has different tastes, diets and allergies, so don't feel like you have to go out and buy all of these items. This is simply a suggestion post and a list of things that I often cook with and like to have on hand.
A Well Stocked Pantry
Further evidence of my grocery shopping problem!
The pantry is easy because most things that live in the pantry have a longer shelf-life. I like to have a stocked pantry at all times, but I also have a large one, so have the space for it. If I had to reduce it down to the "basics", here is what I would include:

Monday, October 1, 2012

Celebrating Anniversaries


lobster tails | www.kettlercuisine.com

It just so happens that today, I am celebrating two different anniversaries! First and foremost, my husband and I have been married for 1 year today! It is so hard to believe that it has been a year since we walked down the "aisle" in the mountains and committed ourselves to each other for the rest of our lives. I wouldn't change ANYTHING about this first year.


Ryan is possibly the most supportive husband a woman could have. He has supported me through it all...full time job, marathon training, house work and my favorite new hobby, KettlerCuisine! He was the one that encouraged me to start the blog on that fateful Spring day.


Speaking of a "fateful Spring day," it has been 6 months today since I officially launched this blog. I know it seems silly to launch a blog on April 1...think about it, April Fool's! However, it has been a lot of fun to keep alive. Friends and family are always asking me about how the blog is going and what they should expect for the future. Well, I can't give all of my secrets away!

Since Ryan is the center of my life and my second love is cooking, it seemed only natural to come up with an over-the-top Anniversary meal that we could plan and cook together. We decided on extending the celebration a day early so we could enjoy more time together.

lobster tails | www.kettlercuisine.com

Lobster!! That was the star of the show last night. We wanted to think of something easy enough that we didn't have to stress over, but delicious enough that would be memorable. 


Desert was taken care of, we had the top layer of our wedding cake that has lived in our freezer since last October 1. My father contributed a nice aged bottle of Tawny Port, and we completed the meal with two sides, one of which is from the blog - Caramelized Pancetta and Fennel Salad.


Lobster Tails

No recipe today, but instead, some tips about our first experience handling and cooking lobster. We tried to find live lobsters, but decided against this once we knew we would have to face the inevitable killing! We settled (which I say lightly because they were amazing) for lobster tails from Whole Foods. I was intimidated!! I had never cooked lobster and it is quite pricey...so there was a lot of pressure to not screw up.

Ryan did his usual Google search for tips on cooking lobster and found some other cooking blogs online. The best bet was to broil them with melted butter on the side. This just further claims my theory of "seafood is best with nothing on it!" These tails were great - no fishy smell at all.

lobster tails | www.kettlercuisine.com

I only made one cut down the center of the tail, but I would suggest making two cuts (discarding the cut shell pieces). Then use your finger, being careful not to cut yourself on the shell, to separate the "meat" from the shell on both sides. The meat should then easily pull away and rest on top of the shell.

lobster tails | www.kettlercuisine.com

Most recipes call to brush the lobster meat with melted butter before cooking, but I did not do this. I simply placed the tails on a foil-lined baking sheet and broiled on high for 5 minutes. That's it!! Our tails were between 4-6 ounces each. If you get smaller ones, reduce the cooking time and visa versa.

lobster tails | www.kettlercuisine.com

Overall, it was a great anniversary. We started the day with a trip to Whole Foods (for our dinner ingredients) and favorite beer store, Bottle Revolution. We had to find some good beer to put in our cute new coozies from Cass and Mike!


We then sat and watched the amazing video that my cousins made from our wedding and the recording of our ceremony (while I sobbed). And finally, we turned on some beach music, (my personal fav - only Southerner's can understand this one) and re-lived our first dance, which started with a choreographed shag (again, only Southerner's can understand this)!!

We ended the night with our amazing meal:
  • Lobster tails with melted butter
  • Blanched asparagus, oscar style
  • Cheddar and jalapeno stone grits
  • Caramelized pancetta and fennel salad
  • Wedding cake and aged Port
lobster tails | www.kettlercuisine.com

Happy Anniversary to the Kettlers and to Kettler Cuisine!

Thursday, September 27, 2012

Pumpkin Season and Pumpkin Puree

When the humidity goes away and the first signs of the fall breeze start to blow through NC, a switch in my brain turns on and all I want is pumpkin pie, muffins, bread, granola, puree, seeds...pumpkin anything! And yes, it might be totally cliche and trendy to love pumpkin flavored dishes in the fall, but I...DON'T....CARE!!

Pumpkin Season and Pumpkin Puree | www.kettlercuisine.com

If you know me, you know that I genuinely LOVE anything pumpkin. And if you don't know me, let me try and express how much...

I don't care how unhealthy it is, if it has pumpkin in it, I am going to devour it! 

Pumpkin Season and Pumpkin Puree | www.kettlercuisine.com

A few years ago, the grocery stores in my area actually ran out of pumpkin puree at the beginning signs of Fall! I freaked out so much that I ordered multiple cans online just so I could have my pumpkin pie on Thanksgiving. A bit extreme, I agree, but that just goes to show how much I love, no, need pumpkin in my life! 

Last year, I tried making my own pumpkin puree to use for baking, oatmeal, or just mixing with ice cream or yogurt. Making your own puree, is a bit time consuming, but develops a whole added flavor level than canned puree. However, I always have a can on backup in the pantry! 

Here are some of my favorite pumpkin recipes that are perfect to make with the pumpkin puree.

Pumpkin Recipes

 - Pumpkin Walnut Granola from Everybody Likes Sandwiches
 - Pumpkin Ale Waffles from The Beeroness
 - Pumpkin and Feta Muffins from 101 Cookbooks
 - Silky Pumpkin Pie at Fosters Market in North Carolina (my go to pumpkin pie recipe)
 - Pumpkin butter from Oh She Glows


Homemade Pumpkin Puree 

Adapted from Oh She Glows
Makes: About 5 cups
Prep Time: 15 minutes
Cook Time: 40-50 minutes

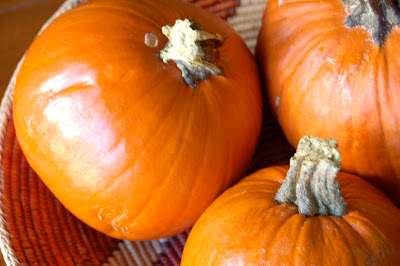
1 (3-5 pound) Sugar Pie pumpkin (I usually do 2 at a time) 
Olive oil spray

Preheat the oven to 350F.

Pumpkin Season and Pumpkin Puree | www.kettlercuisine.com

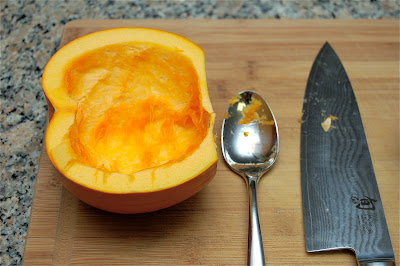
Using a sharp knife, slice the stem off of the pumpkins and cut in half. Take a metal spoon and scoop out all of the "guts" and seeds. The seeds can be reserved and roasted (great recipe here), but I don't usually do this.

Pumpkin Season and Pumpkin Puree | www.kettlercuisine.comPumpkin Season and Pumpkin Puree | www.kettlercuisine.com

Don't worry about the skin, this is best left on the halves since it will easily peel off after the pumpkin is cooked. Brush the inside of the pumpkin halves with a little bit of olive oil and lay (cut side down) on a foil-lined baking sheet.

Pumpkin Season and Pumpkin Puree | www.kettlercuisine.comPumpkin Season and Pumpkin Puree | www.kettlercuisine.com

Bake for 40 minutes at 350F. The pumpkin skin will turn darker and a fork will easily poke through the skin when it is finished. If you start with a larger pumpkin, then the cooking time will be longer. 

With a large spoon, scoop out the "meat" of the pumpkin, or just simply peel off the skin. Place the pumpkin into a food processor or blender (in batches if you have too much). Process or blend until you get a smooth, creamy, even texture. Store in the refrigerator for up to three weeks or store in the freezer for later in the season! 

I like to use my pumpkin puree in my morning yogurt and granola and for baking, like my mother-in-law's famous Pumpkin Bars! And with that....I leave you with this image:

Pumpkin Season and Pumpkin Puree | www.kettlercuisine.com

Sunday, September 16, 2012

Cedar Plank Salmon

This Labor Day weekend was great! Ryan and I didn't have any travel plans and actually had down time to catch up on things. The only "thing" on our list was to pull out the grill! Although we both love seafood, we don't eat it a lot because it can be pricey. But while I was at Whole Food's over the weekend, I ventured past the seafood counter and noticed some fine-looking salmon on display! Fresh caught, and in-season.

Cedar Plank Salmon | www.kettlercuisine.com

I always like to talk to the vendor behind the Whole Food's seafood counter, mostly because they are VERY knowledgeable about fish and always have great suggestions for preparation and recipes. However, this time, I knew exactly how to prepare it - Cedar Plank style!!

Cedar Plank Salmon | www.kettlercuisine.com

Cooking salmon on cedar planks is just one of those meals that Ryan and I both LOVE - kind of like the buttermilk-brined pork chops. It is delicious every time! And I have to admit, Ryan doesn't cook that much, but the man is good on the grill! I know that Dave is smiling down with a proud father grin when I say this :)

Earlier this year, I bought a few cedar planks and we attempted the salmon for the first time, playing around with a few different marinades/sauces. In all honestly, you don't need to have sauce or marinade at all with a cedar plank, but we found this easy combination of flavors to enhance the taste even more. The only "think ahead" note is, remember to soak the plank in water before placing on a grill, so it doesn't disintegrate into flames!

Cedar Plank Salmon Fillets 

Yields: 2 servings
Prep Time: 15 minutes + 1 hour soaking time
Cook Time: 15-20 minutes

2 (6 ounce) salmon fillets with skin
2 tablespoons dijon mustard
tablespoons maple syrup
1 teaspoon fresh rosemary, chopped
1 teaspoon lemon zest (reserve lemon for garnish)
Salt and pepper
Cedar Grilling Planks (soaked for 1 hour)

Place the prepared cedar plank into a large jelly roll pan and pour water on top to cover it. Put a large glass jar on top of the plank to keep it from floating.

Combine the mustard, maple syrup, rosemary and lemon zest in a small bowl and set aside.

Pull the fish out of the refrigerator and place on the counter for 10 minutes to bring closer to room temperature. Season with salt and pepper.

Heat a charcoal grill to medium-high heat (or indirect heating setup) and add the soaked plank to the grill rack, close the cover and heat for 3 minutes, then flip the plank.

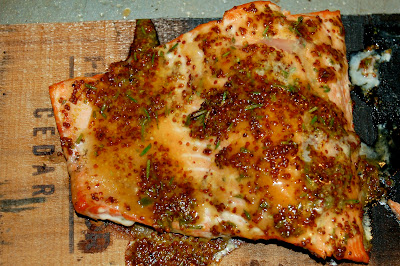
Pull off the plank and place the salmon filets skin-side down on top. Generously brush the marinade on the fillets and cook on indirect heat for 7 minutes. (This is a great time to grill some vegetables for a side dish).

Move the salmon planks closer to the direct heat for 3-5 minutes until the fish is done (depending on thickness of filets.

No flipping necessary, but you can add more marinade while it cooks if you want - the plank adds a lot of flavor though.

Cedar Plank Salmon | www.kettlercuisine.com

Monday, September 3, 2012

7-Layer Bean Dip

Football Season - a time for excitement, disappointment, camaraderie and a lot of yelling. Unfortunately, it is also a time for very unhealthy foods! Since my Crohn's doesn't usually let me indulge in anything cheesy, fried or creamy, I usually always volunteer to bring something myself. And one of my favorite crowd pleasers, that happens to also be a waistline pleaser, is my 7-Layer Bean Dip. 

All you need to do is dedicate a little bit of time and make a few substitutions, and you can make your own easy layer dip that doesn't include all of the calories. 

7-Layer Bean Dip | www.kettlercuisine.com

I thought this would be a perfect addition to the Live Draft Party for my all-girls-fantasy football league. Why should the guys have all the fun???

All the gals brought something over to our friends house, where we setup our computers for draft time. There was a lot of yelling, cursing, a few drinks here and there, and some very good food. Katie decided to make these yummy bits (Oreo Cheesecake Pretzel bites....remember the Chocolate Peanut Butter ones)??

And the table was filled with delicious food from everyone's kitchens.


7-Layer Bean Dip | www.kettlercuisine.com

We put on our jersey's (paused for a very girly picture) and got down to business with the draft. 


The great thing about this dip, is that you can make several layers ahead of time and assemble right before the party or get together. The best way to keep this healthy is to make your own bean layer instead of the mystery refried beans that come from a can.

Here is the layer breakdown:

Layer 1 - "refried" black beans - by starting with whole black beans and adding healthy coconut oil and spices, it cuts back on a lot of the fat
Layer 2 - guacamole made with just avocado and salsa
Layer 3 - light sour cream
Layer 4 - salsa (fresh or your favorite brand)
Layer 5 - sharp cheddar cheese - since there is no melting in this dip, use a sharp cheese and less of it
Layer 6 - fresh chopped lettuce - for a little health benefit
Layer 7 - fresh chopped tomatoes - for a little extra health benefit

7-Layer Bean Dip | www.kettlercuisine.com


7-Layer Bean Dip

Yields: 8x8 dish of dip
Prep Time: 30-45 minutes
Cook Time: 15 minutes

1 Tablespoon oil (coconut or olive)
1 (15.5 ounce) can of black beans, drained and rinsed well
1/4 cup onion, finely chopped
1/2 teaspoon chili powder
1 teaspoon cumin
1/3 cup vegetable broth
1 avocado, mashed
Salsa
Light sour cream
Sharp cheddar cheese, shredded
Romaine lettuce, finely chopped
2 roma tomatoes, chopped
Fresh chives, chopped
Tortilla chips

Start with the bean layer. In a large saute pan over medium heat, warm the oil and saute the chopped onion for about 5 minutes. Stir in the cumin, chili powder and pinch of salt until well combined. Add the black beans and stir to warm up. Stir in the vegetable broth and bring to a simmer. With a potato masher or back of a large spoon, start to mash the beans in the pan. Continue to cook on medium-low heat, stirring and mashing along the way, until the mixture has thickened. Another method to "mashing" the beans is to place them into a food processor. Set the beans aside to cool.

Make the guacamole to your preference. We like to simply mash the avocado and mix in a little of our favorite salsa. Set this aside. 

Once the bean layer has cooled, get ready to assemble the dip. Spread the bean mixture in the bottom of an 8x8 glass dish (or dish being used for the dip). Then spread the guacamole on top of the beans, being careful not to blend them. Next, spread a layer of sour cream, then salsa and shredded cheddar cheese. Place this in the refrigerator until ready to use.

Layer the shredded lettuce and chopped tomatoes on top of the dip right before serving. Garnish with chopped fresh chives.

Serve with your favorite tortilla chips and enjoy!!


7-Layer Bean Dip | www.kettlercuisine.com

Monday, August 20, 2012

Truffle Honey Mustard

Mustard every day

If there is one condiment that I can't live without, it is mustard. I will eat any kind, yellow, dijon, brown, honey, whole grain....love it! So when Ryan and I went out for dinner one night and ordered the soft pretzels with truffle honey mustard, my mouth about exploded with flavor-awesomeness!

Truffle Honey Mustard | www.kettlercuisine.com

I immediately took a picture with my phone and made a note to try to re-make this at home. I couldn't help myself, the next night I started playing around with the flavors to see if I could come up with my own version. After several tries (and many Hubby taste tests) the recipe came together. 


Initially I was thinking that I could use this as a salad dressing, but with a thicker texture, I decided that it would be better as a dipping sauce or condiment for a sandwich or wrap. 


I had it on a veggie burger wrap for lunch the next day and it was delicious! I added spinach, radishes and a bit of goat cheese as well. Yum!!!


Truffles

I should probably include a few comments about truffles and truffle oils since this is not an item normally found in kitchens, mostly because it is expensive. However, I've had the same little bottle of white truffle oil for about 3 years now. The flavor is very pungent, so very little is needed. 

Not to be confused with the chocolate kind, truffles are in the mushroom family and are cultivated in Europe, mostly Italy, France and Spain. There are two main types, white and black. The white has a more pungent flavor and the black is more earthy. I prefer the white truffle flavor. 


The most economical way to get the flavor of truffle at home is through an oil. Most truffle oils don't actually contain truffles in them though. They are artificially flavored to taste like it - little known fact! 


Regardless, I like the flavor of truffle oil and would highly recommend that you try it if you have never tasted it. I drizzle the oil on top of fritata's, like the
Very Veggie Fritata or over salads in place of dressing. Also, it is a great finishing oil, but don't cook with it!

Truffle Honey Mustard

Prep Time: 10 minutes
4 tablespoon honey
tablespoon  whole grain mustard
tablespoon  truffle oil
tablespoon  olive oil
pinch of red pepper flakes
salt and pepper to taste

In a small bowl, mix all the ingredients together, except the salt and pepper, until well combined. Add salt and pepper to taste. Store in an air tight container and keeps in the refrigerator for several weeks.

Serving ideas:
  • dip for chips or pretzels
  • salad dressing
  • condiment for sandwiches or breakfast wraps
  • with scrambled eggs

Sunday, July 29, 2012

The Ultimate Bloody Mary

Beach Weekend and Bloody Mary's!

This past weekend, Ryan and I headed down to Bald Head Island for a fun getaway with close friends. For three days we feasted on seafood and drank Corona's. It was a relaxing wonderful long weekend. Since this is just one of the many trips we have planned for July and early August, I have not been in the kitchen much lately. Therefore, I want to share the best Bloody Mary we have ever tasted!

The Ultimate Bloody Mary | www.kettlercuisine.com

Our friend, Will likes to eat and drink well, so when he brought homemade Bloody Mary mix to share, I had to get the recipe! The entire weekend, everyone raved about the mix, calling it the best "Bloody" they have ever had! I agreed, although I would have to tone down the spice level a bit for my weak pallet! He combined two different recipes and made his own tweaks for The Ultimate Bloody Mary! Cheers!!

The Ultimate Bloody Mary

Adapted from Former Chef and Alton Brown
Yields: 4-6 cocktails

3 tablespoons dijon mustard
3 tablespoons Worcestershire sauce
2 tablespoons prepared horseradish
2 tablespoons pickle brine
2 tablespoons hot sauce (he used Chesapeake Fire w/ a dash of You Can't Handle This)
1 large clove of garlic
1 pint grape tomatoes
1 fresh jalapeño
Juice from 2 lemons
Juice from 2 limes
2 teaspoons fresh ground black pepper
2 teaspoons kosher salt 
1 teaspoons Old Bay seasoning
64 ounces low-sodium V8

Combine all ingredients except V8 and then puree for 3-5 minutes. Pour out (or drink) enough of the V8 to funnel mixture into the bottle. Shake well, chill, add desired amount of vodka and enjoy.

Friday, July 20, 2012

Raw Chocolate Brownies

I am so excited to share this post with you. Don't get me wrong, I love sharing all my posts with you, but this one in particular makes me very happy! I have discovered the most amazing recipe for brownies, raw brownies to be specific. I know, I know, the raw diet is such a fad and totally gross - who wants to eat cold food all the time! Well, I am here to tell you that it isn't all bad. Close your eyes and imagine a delicious brownie, now think about that brownie not being baked or having any sugar, gluten or eggs. What??? No way, Jessica!

Raw Chocolate Brownies | www.kettlercuisine.com

I am totally serious though, My New Roots hit the jackpot with this recipe. I have been making them nonstop so I have a constant stash in my freezer for a quick sweet treat. They are perfect and absolutely delicious! 

The secret to these are Medjool dates - not a common food in American cuisine, but should be! They are very common in Middle Eastern cuisine, which is where most are cultivated. Dates can replace sugar or honey in recipes and are rich in fiber and other vitamins. They kind of taste like caramel!! Dates have a very sticky consistency, but provide layered flavors and texture, which make them great for baking. So naturally, dates are perfect to replace sugar in this recipe.

Raw Chocolate Brownies | www.kettlercuisine.com

The other secret to these brownies are using raw cacao (not to be confused with cocoa). Cacao (pronounced ka-kow) refers to the actual tree, pod and bean that chocolate comes from. Cocoa refers to the by-products of the raw cacao bean (powder and butter). Many think that the two powder forms are interchangeable, but after some research I discovered that cacao powder refers to raw, unsweetened powder, where as cocoa powder might still have small amounts of cocoa butter in it to enhance the flavor.

Raw Chocolate Brownies | www.kettlercuisine.com
I had cacao nibs in my pantry, so I ground them first into a powder.

Therefor, Mixing the cacao with the dates basically makes a form of chocolate but without the sugar additive. Not to mention that cacao is one of the best sources of magnesium found in nature!

Raw Chocolate Brownies | www.kettlercuisine.comRaw Chocolate Brownies | www.kettlercuisine.com

The best part about these brownies, they are super healthy! Dates, almonds, raw cacao, walnuts are all super foods. With their powers combined, they are Captain Planet! No, just kidding, but they are super healthy and taste delicious. A cooking phenomenon!!

Feel free to get created with the recipe with the add-ins. I like to use a bit of sea salt and chopped raw almonds. My friend Meg makes these a lot as well and adds in coconut. Dried fruit or macadamia nuts would be a great add-in as well.

Raw Chocolate Brownies | www.kettlercuisine.com

I tweaked the recipe from My New Roots to reduce the amount of dates in the brownies, which helps create a stronger chocolate flavor. It also helps the brownies hold together better and not have as much oils and liquids come out from the dates because of the hot humid weather in NC. 

Raw Brownies

Adapted from My New Roots
Yields: 8x8 pan of brownies
Prep time: 20 minutes

2 cups whole walnuts
1 cup raw cacao powder
1/2 teaspoon sea salt (or more to taste)
8 ounces fresh organic Medjool dates, pitted
1 cup raw unsalted almonds, chopped

Place the walnuts into a food processor and blend until finely ground. Add in the cacao powder and sea salt and pulse just until combined. Add in the dates, one at a time through the feed tube of the food processor while it is running. The mixture will start to come together when pressed. 

Pour the mixture into a large bowl and add in the chopped almonds. Stir until the almonds are well incorporated, I like to use my hands for this! 

Press the mixture into an 8x8 pan lined with parchment paper. The consistency will be like fudge in a way, it is dense and thick. 

Raw Chocolate Brownies | www.kettlercuisine.com

Place the pan in the freezer for at least an hour, remove from the pan using the parchment paper and cut into small squares. I cut them into 1 inch

Friday, July 13, 2012

Oregano Pesto

This is the third summer Ryan and I have been in our house, and every summer we add one more thing to our "garden." I put garden in quotes because it refers to pots on our back patio. We live in a town home, and are not allowed to dig into the ground, so we have to keep everything in pots. This pretty much limits us to growing herbs and some vegetables.

Oregano Pesto | www.kettlercuisine.com

I love having my own little herb garden though! I cook with herbs all the time and even use them in cocktails. I add them to everything and think fresh herbs are so much better than dried! This is one of my favorite recipes to highlight all the fresh herbs from the garden, Zucchini Pie.

This year, we got a bit ahead of ourselves and decided to add SEVERAL new things - chives, spinach, oregano and a new kind of mint. I usually get herbs that are already potted and transfer them, and I always buy organic ones so I can start using them right away. Archer Lodge Herb Farm is my favorite spot at the Raleigh Farmer's Market to pick some up. I am waiting patiently for them to get parsley and tarragon so I can add to my collection!

Oregano Pesto | www.kettlercuisine.com

Since the weather has been warm and we've had random rain showers, the herbs are growing like crazy!! I usually bring in a bunch to work and hand out so I don't have to throw them away. But another great solution is to make pesto! 

Oregano Pesto | www.kettlercuisine.com

Most people think of pesto with basil, which is usually true. But why not take the same concept and apply it to other herbs that are growing rampant in our garden. Oregano was one that I need to use up and fast! I have included a recipe for oregano pesto below, but this has a bite to it - be forewarned! 

For a good basic basil pesto, head over to Heidi's site on
101 cookbooks for an authentic Italian recipe (here is a hint, it is all in the technique).

Oregano Pesto

Prep Time: 10 minutes

2 cups packed fresh oregano leaves
1/2 cup packed fresh basil leaves
1/3 cup hazelnuts, toasted
1/2 cup shredded Manchego cheese
2 small cloves of garlic, roughly chopped
1/2 teaspoon salt
1/4 teaspoon  black pepper
1/2 olive oil (plus more per taste)
1/4 teaspoon lemon juice

Here is the easy part - put everything into a food processor and start blending it all together until you get a well combined pesto. Add in more salt and pepper to desired taste and lemon juice to prevent the pesto from turning brown. Keep this in an airtight container in the refrigerator for up to 3 weeks.