Showing posts with label main dish. Show all posts

Tuesday, November 27, 2012

Tales of a Weary Traveler and Minestrone Soup

Five weekends down, two more to go. After a month of traveling, Ryan and I are "hitting the wall," as they say in the running world. We are in the middle of a traveling marathon visiting friends, family and running in races. 

This past long weekend was fantastic. We were beach-bound for a Hegele Thanksgiving Extravaganza (Hegele is my maiden name). Most of my crazy family gathered for food, fun and several drinks! We then traveled to Charlotte for my high school reunion, which was more food, fun and several drinks! 

Minestrone Soup | www.kettlercuisine.com

After this type of weekend, Ryan and I seriously crave vegetables. Since we only have a few nights until we jet off again (this time to NYC), I thought a vegetable soup was in order and would last us a few nights without filling up our fridge with a million items.

A hearty winter minestrone soup sounded like the perfect thing for me! To make things easier, I started from an established recipe so I could just chop and drop in the large soup pot. We both thoroughly enjoyed this recipe from Ina Garten's (also known as The Barefoot Contessa) Barefoot Contessa Foolproof: Recipes You Can Trust. I did make some changes (of course) to the recipe, so here are my notes:
  • I usually always increase the garlic in recipes because we love garlic in our house. If you are not too keen on garlic, reduce the amount or leave it out entirely.
  • If you can find fresh bay leaves, use those! Same for the other dried herbs. However, I don't like spending a lot of money on fresh herbs in the winter.
  • Chop the onion, celery, carrot and butternut squash into even size pieces. This ensures even cooking!
  • If you are like me and save your Parmesan rinds, this is a perfect soup to throw one into.
Minestrone Soup

The recipe falls somewhere between a soup and a stew, filling your bowl with hearty vegetables.


Winter Minestrone Soup

Recipe Adapted from Barefoot Contessa Foolproof: Recipes You Can Trust by Ina Garten
Serves: 6-8
Prep Time: 30 minutes
Cook Time: 40 minutes

Good olive oil
4 oz. pancetta, diced
2 cups yellow onion, chopped
2 cups carrots, chopped 
2 cups celery, chopped
2 cups butternut squash, peeled, chopped
5 cloves garlic, minced
1/2 tsp dried thyme
1/2 tsp dried oregano
1/2 tsp dried sage
26 oz. can diced tomatoes
6 cups chicken stock
2 bay leaves
Salt and Pepper
1 (15oz.) can cannellini beans, drained and rinsed
2 cups cooked small pasta (which is about 1 cup dried pasta)
4 cups fresh spinach, roughly chopped
1/2 cup dry white wine
2 T pesto
Parmesan, rind and freshly grated

Heat 2 T olive oil over medium heat in a large, heavy pot or Dutch oven. Add the pancetta and cook over medium-low heat for 6-8 minutes, stirring occasionally to keep it from sticking to the bottom. When the pancetta is lightly browned, pour in 2 T of white wine to deglaze the pan. Be sure to scrap up the bits on the bottom well with a wooden spoon. When the wine has reduced down a bit, add in the onion, garlic, carrot, celery, butternut squash, thyme, oregano and sage. Cook this over medium heat, covered, stirring occasionally for about 8-10 minutes until the vegetables start to soften.
Minestrone Soup

Add in the tomatoes, chicken stock, bay leaves, salt and pepper to the pot. Bring this to a boil, then lower the heat and simmer covered for 30 minutes, until the vegetables are tender. While the soup simmers, boil the pasta and set aside.

Minestrone Soup

Stir in the drained beans and cooked pasta, heat through. The soup should be quite thick but if it is too thick, add more chicken stock. If making the soup ahead, stop here and refrigerate until ready to serve.

To serve, reheat the soup, add the spinach and cook until wilted. Stir in the white wine and pesto. Serve with shredded Parmesan

Friday, October 26, 2012

Pumpkin Recipe Roundup: Pumpkin and Pancetta Pasta

After last weeks pumpkin post, I had to re-group and get back to my health conscious ways! Every time I taste the pumpkin puree, even though I know what it tastes like, I am surprised at the lack of sweetness. When I think pumpkin, I think sweets (probably like most American's). The idea of pumpkin as being sweet is engrained in our minds. But in fact, pumpkin is not. Pumpkin in its cleanest, most naked form is rustic and savory....much like any winter squash. Oh right, pumpkin IS a squash!!

Pumpkin and Pancetta Pasta | www.kettlercuisine.com

I decided to throw a curve ball on my Pumpkin Recipe Roundup and come up with a savory recipe. Ryan is not the biggest fan of winter squash, so I had to come up with something that he would like despite his dislike of squash consistency. Ok, ladies and gentlemen, here is a test of your Kettler Cuisine blog loyalty. What ingredient do I like to add to recipes so that my sweet husband will eat it......BACON!! That's right, but in a more gourmet fashion, pancetta was used in this one. 

I did a pasta bake, or baked ziti if you will. Cheese and bacon was bound to win my husband over. This recipe could easily be swapped with butternut squash or other winter squash. While pumpkin has a bit more of a mild flavor, butternut squash is a tad bit sweeter. However, in the spirit of Fall, and our society's massive obsession, I decided to highlight pumpkin....in true American fashion!!

Pumpkin and Pancetta Pasta | www.kettlercuisine.com


Pumpkin and Pancetta Pasta

Yields: 6 servings
Prep Time: 45 minutes
Cook Time: 1 hour, divided


4 cups pumpkin, peeled and cubed (about 1 sugar pie pumpkin)
olive oil
6 ounces pancetta, cubed
1/2 red onion, thinly sliced
1 teaspoon salt, divided
4 garlic cloves, minced
12 ounces dried ziti pasta
5 cups kale, de-stemmed and chopped
1 1/4 cups vegetable broth, divided
1 T flour (for gluten free use corn starch or arrowroot)
1/2 teaspoon crushed red pepper
1/2 cup creme fraiche (or light cream cheese)
3/4 cup gruyere cheese, shredded (or sharp white cheddar cheese), divided

Preheat the oven to 400F. Line a large baking sheet with aluminum foil and rub olive oil on the foil.

Pumpkin and Pancetta Pasta | www.kettlercuisine.com

Combine the pumpkin and about 1 T olive oil in a large bowl and stir to evenly coat the pumpkin. Spread the pumpkin in an even layer on the baking sheet and cook at 400F for about 30 minutes or until tender. Set aside. Leave the oven at 400F and grease a 13x9" baking dish.

Fill a large pasta pot with water and bring to a boil, while prepping the pancetta and onion mixture.

Pumpkin and Pancetta Pasta | www.kettlercuisine.com

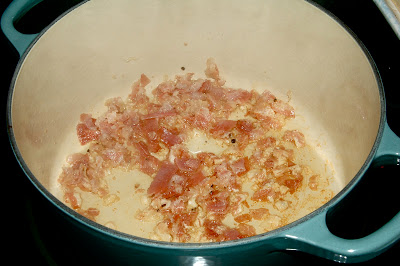
In a large saute pan, cook the pancetta on medium heat until crispy. Transfer to a paper towel-lined plate, reserving some of the drippings. Cook the red onion in the remaining drippings for about 8-10 minutes, stirring frequently. Add in the garlic and 1/2 tsp salt and cook for another minute. Set this aside.

Pumpkin and Pancetta Pasta | www.kettlercuisine.com

Once the pot of water starts to boil, cook the pasta until almost al dente (about 6-7 minutes). Add in the kale and cook for another minute and immediately strain and set aside.

In a sauce pan, bring 1 cup of vegetable broth to a boil. Take the remaining 1/4 cup of broth and mix with flour (or corn starch if doing a gluten free version) and stir into the boiling broth. Cook this for another 2 minutes, stirring continuously until the sauce has thickened. Turn off the heat and stir in 1/4 cup of the shredded cheese and all the creme fraiche in small batches until melted and the sauce is creamy. Remove from heat, a creamy cheese sauce will result.

Pumpkin and Pancetta Pasta | www.kettlercuisine.com

In a large bowl stir the pumpkin, onion mixture, pancetta, pasta, kale and cheese sauce until evenly combined. Pour into a greased 13x9" baking dish and sprinkle the remaining shredded cheese on top. Cook for 25 minutes in a 400F oven until bubbly and slightly browned on top.

Pumpkin and Pancetta Pasta | www.kettlercuisine.com

Monday, October 1, 2012

Celebrating Anniversaries


lobster tails | www.kettlercuisine.com

It just so happens that today, I am celebrating two different anniversaries! First and foremost, my husband and I have been married for 1 year today! It is so hard to believe that it has been a year since we walked down the "aisle" in the mountains and committed ourselves to each other for the rest of our lives. I wouldn't change ANYTHING about this first year.


Ryan is possibly the most supportive husband a woman could have. He has supported me through it all...full time job, marathon training, house work and my favorite new hobby, KettlerCuisine! He was the one that encouraged me to start the blog on that fateful Spring day.


Speaking of a "fateful Spring day," it has been 6 months today since I officially launched this blog. I know it seems silly to launch a blog on April 1...think about it, April Fool's! However, it has been a lot of fun to keep alive. Friends and family are always asking me about how the blog is going and what they should expect for the future. Well, I can't give all of my secrets away!

Since Ryan is the center of my life and my second love is cooking, it seemed only natural to come up with an over-the-top Anniversary meal that we could plan and cook together. We decided on extending the celebration a day early so we could enjoy more time together.

lobster tails | www.kettlercuisine.com

Lobster!! That was the star of the show last night. We wanted to think of something easy enough that we didn't have to stress over, but delicious enough that would be memorable. 


Desert was taken care of, we had the top layer of our wedding cake that has lived in our freezer since last October 1. My father contributed a nice aged bottle of Tawny Port, and we completed the meal with two sides, one of which is from the blog - Caramelized Pancetta and Fennel Salad.


Lobster Tails

No recipe today, but instead, some tips about our first experience handling and cooking lobster. We tried to find live lobsters, but decided against this once we knew we would have to face the inevitable killing! We settled (which I say lightly because they were amazing) for lobster tails from Whole Foods. I was intimidated!! I had never cooked lobster and it is quite pricey...so there was a lot of pressure to not screw up.

Ryan did his usual Google search for tips on cooking lobster and found some other cooking blogs online. The best bet was to broil them with melted butter on the side. This just further claims my theory of "seafood is best with nothing on it!" These tails were great - no fishy smell at all.

lobster tails | www.kettlercuisine.com

I only made one cut down the center of the tail, but I would suggest making two cuts (discarding the cut shell pieces). Then use your finger, being careful not to cut yourself on the shell, to separate the "meat" from the shell on both sides. The meat should then easily pull away and rest on top of the shell.

lobster tails | www.kettlercuisine.com

Most recipes call to brush the lobster meat with melted butter before cooking, but I did not do this. I simply placed the tails on a foil-lined baking sheet and broiled on high for 5 minutes. That's it!! Our tails were between 4-6 ounces each. If you get smaller ones, reduce the cooking time and visa versa.

lobster tails | www.kettlercuisine.com

Overall, it was a great anniversary. We started the day with a trip to Whole Foods (for our dinner ingredients) and favorite beer store, Bottle Revolution. We had to find some good beer to put in our cute new coozies from Cass and Mike!


We then sat and watched the amazing video that my cousins made from our wedding and the recording of our ceremony (while I sobbed). And finally, we turned on some beach music, (my personal fav - only Southerner's can understand this one) and re-lived our first dance, which started with a choreographed shag (again, only Southerner's can understand this)!!

We ended the night with our amazing meal:
  • Lobster tails with melted butter
  • Blanched asparagus, oscar style
  • Cheddar and jalapeno stone grits
  • Caramelized pancetta and fennel salad
  • Wedding cake and aged Port
lobster tails | www.kettlercuisine.com

Happy Anniversary to the Kettlers and to Kettler Cuisine!

Friday, September 21, 2012

Wing (End)Zone


Wing (End)Zone | www.kettlercuisine.com

This is our precious goddaughter, Avery. And she is ready for some football! Much like many of our other friends that came over the other weekend for opening football weekend!! Ryan and I figured we would go all out and make wings. We decided on three different kinds and put out the usual carrot and celery with ranch dip. All of our guests contributed to the food supply as well.

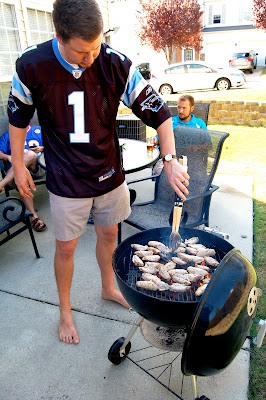
Normally I don't recommend trying a new recipe for a party, but wings sounded so delicious and with Ryan's grilling skills, I knew we would pull through! We not only tried a new recipe for our shin-dig, we tried grilling wings for the first time. Let's just say, touchdown!!

Wing (End)Zone | www.kettlercuisine.com

Wings are one of those dishes that we previously would have only ordered in a restaurant because they are more hassle than delicious. I am not a frequent wing-eater either, mostly because they are deep fried and don't agree with my stomach. However, my husband LOVES wings, possibly one of his favorite foods (along with Ranch dressing and Bojangles). He always seems to find an excuse to go out for Wing Night with the boys. 

He prefers the buffalo sauce, which is my least favorite! Here we are again folks, at the culinary crossroads to find something we agree on...not only on the "sauce," but the method of cooking. 

Frying was definitely not going to happen. From the day we said "I Do," it was clear that nothing would be fried in my kitchen! So I gave him the buffalo sauce in exchange for not frying. We then agreed on two other flavors - Sweet and Spicy and Stout Jerk. We looked for recipes that called for grilled wings, which was hard to find! Most recipes call for baking or frying the wings.

Wing (End)Zone | www.kettlercuisine.com

We followed the Sweet and Spicy recipe from Serious Eats exactly but altered the Stout Jerk one from The Beeroness slightly. And, just for my beloved, we grilled plain wings to cover in buffalo sauce :)

For the Sweet and Spicy wings, hop over to Serious Eats and try out this recipe (my personal fav of the day). 

For the Buffalo wings, we simply marinaded chicken wings (and drumsticks) in pepper, salt and olive oil for a few hours, grilled them and then poured our favorite wing sauce on top.

Wing (End)Zone | www.kettlercuisine.com

And finally, the Stout Jerk Chicken wings recipe which we got from The Beeroness. We decided to grill them instead of baking and they turned out fantastic! Side note about The Beeroness blog, it is awesome! She uses craft beers in all of her recipes. The girl really knows how to cook! I will definitely share more of her recipes in the future since my husband keeps begging me to make them. You might recall his love of craft beers from this post.

Stout Jerk Chicken Wings

Adapted from The Beeroness, Inspired from Blood, Bones & Butter
Yields: 6-8 servings (appetizer portion)
Prep Time: 2-24 hours (depending on marinade time)
Cook Time: 15-25 minutes

1/2 cup stout beer (we used Stone Imperial Stout)
4 small Habanero peppers, seeded and roughly chopped
6 cloves of garlic, peeled
3 tablespoons ponzu sauce (Asian citrus sauce)
3 tablespoons brown sugar
1 teaspoon dry mustard powder
2 teaspoons Chinese 5 spice powder
1 teaspoon black pepper
3 tablespoons shallots, finely chopped
1 tablespoon fresh squeezed lemon juice
2 tablespoons honey
1 teaspoon sea salt
3 pounds chicken wings and thighs

Add all of the ingredients except the chicken into a food processor and mix until smooth.

Rinse the chicken in water and pat dry. Place into a large heavy duty Ziploc bag. Pour the marinade over the chicken and seal the bag tightly. Gently move the chicken around in the marinade to evenly distribute. Place the bag into a large baking dish and refrigerate for at least 1 hour or overnight. Move the marinade around and flip the chicken every 2 or 3 hours to redistribute the sauce.

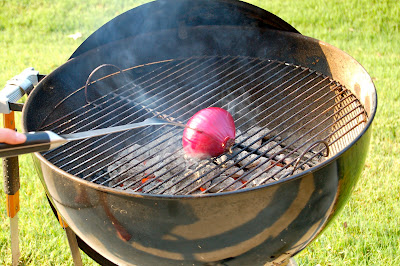
Once ready to cook, remove the bag from the refrigerator 30 minutes prior to grilling. Heat a charcoal grill to medium-high heat, creating a direct heat side and an indirect heat side (by placing coals on one side of the grill).  Grease the grill grates (can use the half onion dipped in olive oil method that Ryan uses).

Wing (End)Zone | www.kettlercuisine.com

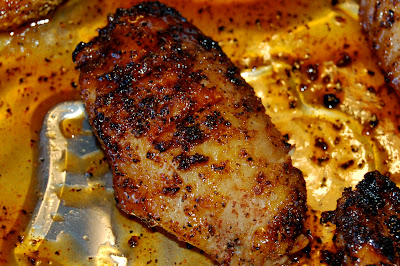
Place the chicken wings and thighs on the indirect side, cover and cook until the skin starts to brown, anywhere between 7-15 minutes (depending on the size of the wings). Move the wings to the direct heat side of the grill and continue to cook until the skins have crisped, another 2-3 minutes. Depending on the size of the wings, you might want to remove one wing and test to make sure the chicken is cooked through before removing all. Once the chicken is cooked through, remove the wings from the grill and place on a large serving dish with plenty of wet naps on the side! Delicious!

Wing (End)Zone | www.kettlercuisine.com

*Tip from the Grill Master

After reading this post, I received a lovely email from our close friends, the London's. You might remember them from this post. Anyways, Hal is by far one of the best Griller's I know of and he adds a few steps when grilling chicken wings:
When you remove the wings from the grill, toss them in a large mixing bowl with your favorite BBQ or wing sauce and then put them back on the grill to "set" the sauce. This creates a few crispies on the skin according to Hal. Another plus, is it helps keep the wings a little less messy. 

We are certainly going to try this next time we grill wings Hal and Sandy. Thanks for the feedback and for following the blog :)

Sunday, September 16, 2012

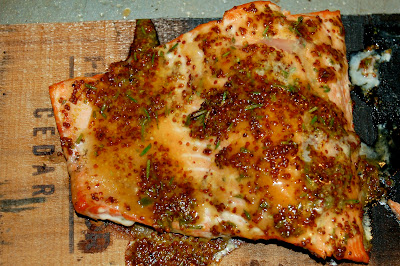
Cedar Plank Salmon

This Labor Day weekend was great! Ryan and I didn't have any travel plans and actually had down time to catch up on things. The only "thing" on our list was to pull out the grill! Although we both love seafood, we don't eat it a lot because it can be pricey. But while I was at Whole Food's over the weekend, I ventured past the seafood counter and noticed some fine-looking salmon on display! Fresh caught, and in-season.

Cedar Plank Salmon | www.kettlercuisine.com

I always like to talk to the vendor behind the Whole Food's seafood counter, mostly because they are VERY knowledgeable about fish and always have great suggestions for preparation and recipes. However, this time, I knew exactly how to prepare it - Cedar Plank style!!

Cedar Plank Salmon | www.kettlercuisine.com

Cooking salmon on cedar planks is just one of those meals that Ryan and I both LOVE - kind of like the buttermilk-brined pork chops. It is delicious every time! And I have to admit, Ryan doesn't cook that much, but the man is good on the grill! I know that Dave is smiling down with a proud father grin when I say this :)

Earlier this year, I bought a few cedar planks and we attempted the salmon for the first time, playing around with a few different marinades/sauces. In all honestly, you don't need to have sauce or marinade at all with a cedar plank, but we found this easy combination of flavors to enhance the taste even more. The only "think ahead" note is, remember to soak the plank in water before placing on a grill, so it doesn't disintegrate into flames!

Cedar Plank Salmon Fillets 

Yields: 2 servings
Prep Time: 15 minutes + 1 hour soaking time
Cook Time: 15-20 minutes

2 (6 ounce) salmon fillets with skin
2 tablespoons dijon mustard
tablespoons maple syrup
1 teaspoon fresh rosemary, chopped
1 teaspoon lemon zest (reserve lemon for garnish)
Salt and pepper
Cedar Grilling Planks (soaked for 1 hour)

Place the prepared cedar plank into a large jelly roll pan and pour water on top to cover it. Put a large glass jar on top of the plank to keep it from floating.

Combine the mustard, maple syrup, rosemary and lemon zest in a small bowl and set aside.

Pull the fish out of the refrigerator and place on the counter for 10 minutes to bring closer to room temperature. Season with salt and pepper.

Heat a charcoal grill to medium-high heat (or indirect heating setup) and add the soaked plank to the grill rack, close the cover and heat for 3 minutes, then flip the plank.

Pull off the plank and place the salmon filets skin-side down on top. Generously brush the marinade on the fillets and cook on indirect heat for 7 minutes. (This is a great time to grill some vegetables for a side dish).

Move the salmon planks closer to the direct heat for 3-5 minutes until the fish is done (depending on thickness of filets.

No flipping necessary, but you can add more marinade while it cooks if you want - the plank adds a lot of flavor though.

Cedar Plank Salmon | www.kettlercuisine.com

Thursday, August 23, 2012

Kettler Tomato Pie

Tomato Season!!!

I don't really have a cute story to tell beyond the fact that we love tomato season in the Kettler house! We purchased about 5 lbs at the market with no plan on how to use them. We just walked around the market tasting all the tomatoes and couldn't stop buying them. 

Kettler Tomato Pie | www.kettlercuisine.com

One of my favorite recipes is a tomato pie - not the stereotypical Southern, mayo-loaded pie, but a fresh, basil-kissed one!

This is possibly the most simple "pie" to assemble, but the tricky part is getting the right tomatoes. If you use really ripe tomatoes, they will create so much juice during the cooking process that you end up with more of a soup than a pie. But if you get tomatoes that are not ripe enough, they are not sweet.


Kettler Tomato Pie | www.kettlercuisine.com

Wednesday, August 15, 2012

Light Cajun Alfredo Sauce

My husband and I have been together for over 8 years and I can honestly say, I have never made Alfredo sauce for him, which is his favorite. I know, bad wife! I've never been a fan of cream sauces or making Alfredo sauce at home (usually I just get store bought and heat separate sauces for our pasta). 

Alfredo on the Light Side

In an effort to try to come up with a lighter version of Alfredo and one that I would enjoy as well, I thought about adding some spice.

Light Cajun Alfredo Sauce

Sunday, August 12, 2012

Grill, Meat, Football

I got home Thursday night to a happy husband....a VERY happy husband. He had the coals on the grill heating up, our Meat House steak tips and veggies laid out and counting down the minutes until NFL preseason started! 


It certainly was a nice treat to have him prep and cook dinner, all I had to do was steam broccoli and slice a tomato. He stepped outside with a huge grin on his face to start grilling (oh, the relationship between a man and his grill is almost as enigmatic as the one with football). I offered to get him a drink and he giddily asked for the new Stout that was chilling in the fridge. I opened and poured some for the both of us. 

We opened a bottle of one of our good wines (from a wedding gift case we got from a family friend) and enjoyed the hell out of that steak! It is amazing that among our chaotic lives, we still find simple pleasures in food and drink (and football). We watched our beloved NC State Alum, Philip Rivers take on the Packers, and enjoyed the beginning of football season. (Why the network wasn't playing Peyton's debut, I shall never know!!)


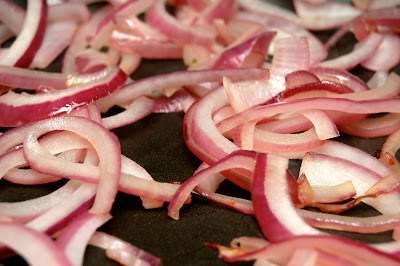
So, in the spirit of my blog, I have to include a little something about our meal. When Ryan grills, he takes half a red onion and greases the grill with olive oil. This adds extra flavor and prevents the use of an aerosol cooking spray. I took the other half of the onion, sliced it and sauteed it in some of the delicious Stout beer that we were drinking that night. The beer gave the onions a yummy caramel coating, which paired well with fresh tomato slices and basil from our garden.

The onions caramelize in about ten minutes - a flavorful and easy addition to any cookout or dinner salad!

Friday, August 3, 2012

Curry Broccoli and Couscous

Yay!! I am so happy to be back in the kitchen! July was a whirlwind of traveling to every corner of North Carolina and beyond. We had A LOT of great times with friends and family, by all the traveling messed with my weekly routine of training for the marathon, healthy eating and sleep! So when I actually had a day off of training and no errands to run after work the other day, I told Ryan that he could find me in the kitchen for the next 4 hours! I was so happy, cooking, taking pictures, blogging (and maybe drinking a martini or two). Ryan snapped this pic when I turned to get my camera!


Kettler Cuisine


Back in the Kitchen


I had several things on the docket for the evening cooking event:
  • Cherry Chocolate Brownies - to be posted later
  • Mango Black Bean Salsa for my weekend girls beach trip
  • Roasted Red Pepper dip - to be posted later
  • And dinner - a new Kettler creation - Curry Broccoli and Couscous

Curry Broccoli and Couscous

I believe I have mentioned this before, but Ryan and I LOVE Indian cuisine. We have our dear friends Dhruv and Karishma to thank for this. We kept telling them how we disliked Indian cuisine and one day Dhruv said, "We are going to cook you a traditional Indian meal, then we will see." Karishma made 7 or 8 dishes, and each of them blew us away! Ever since then, we have been hooked. Dining out, making our own curries, shopping at the local Indian market for better spices, yum! 

I started playing around with different types of sauces, spices and Indian flavors based on a cookbook I had bought. I am certainly no expert yet, but at least my dishes can keep the Hubby happy :)

So after a lot of basic American cooking this past month, I decided to change it up and try a new curry recipe starring Ryan's fav - broccoli. (And you know me, anytime I can get him to eat more veggies, I am happy)!

Curry Broccoli and Couscous

I started by chopping up all the vegetables, then played around with the sauce flavors. After about 3 attempts at the sauce, I finally was happy with the results. I then made the couscous, steamed the broccoli, sauteed the veggies and mixed everything together.

Curry Broccoli and Couscous

Serves: 4
Prep Time: 15 minutes
Cook Time: 20 minutes

2 small broccoli heads, chopped into bite size florets
3 carrots, shredded (about 1 cup)
8 mushrooms of choice, sliced (about 1 1/2 cups)
1 small red onion, chopped (full 1 cup)
2 T ghee or butter
salt and pepper

1 1/4 cup vegetable broth
1 cup plain dried couscous
salt

2 tsp white balsamic vinegar
4 T olive oil
1 tsp agave or honey
1 tsp curry paste (we used red)
3 tsp curry powder
1/4 cup low fat milk

Optional - golden raisins for garnish

Start by chopping and shredding all the vegetables (broccoli, carrots, mushrooms and onion). Feel free to add in other vegetables of choice as well. I like to chop and cut all the ingredients first before cooking, so I am ready for steps when needed.

Steam the broccoli florets. I like to use a microwave steamer for ease, but anyway you can steam them is fine. Set aside.

Curry Broccoli and Couscous

In a small bowl, combine the vinegar, olive oil, agave/honey, curry paste, curry powder and milk together. Whisk well until all the ingredients are well incorporated. Set the curry sauce aside.

In a small saucepan, bring the vegetable broth to a boil, then add the couscous and a pinch of salt. Quickly stir this, remove from the heat and cover the saucepan. The couscous will be done in about 5 minutes, at which point you can fluff the couscous.

Once the couscous is cooking, start sauteing the vegetables. In a large saute pan, melt the ghee or butter and add the onions. Saute the onions for about 2-3 minutes and add in the shredded carrots. 

Curry Broccoli and Couscous

Cook this for another 2-3 minutes and add the mushrooms (and any other raw vegetables except the steamed broccoli). Let this saute for about 5 minutes until cooked down. Add in the broccoli and curry sauce and lower the heat to medium-low. Stir to combine all the ingredients and cook on low for about 5 minutes to incorporate the flavors. 

Curry Broccoli and Couscous

To serve, either add in the couscous to the vegetable mixture or serve the vegetable mixture over the couscous. Either way, it is delicious with some Naan and mango chutney! Ryan likes to add some heat, so he has a hot garlic chutney that Dhruv had recommended.

*Note, if you like more sauce, just double the recipe, except for the vegetables.

*Note, this can easily be served over quinoa or other gluten-free grain for specific dietary needs. I put the leftovers over lettuce and it was a fantastic salad for lunch!

Wednesday, August 1, 2012

Stewed Butter Beans

Beans usually are not the most desired vegetable among the younger generation, but butter beans are called butter beans for a reason. When they are cooked, they taste like butter!

Stewed Butter Beans | www.kettlercuisine.com

Also known as lima beans, these are another one of my favorite summer vegetables that are abundant at our local Farmer's Market. I hate to be picky again, but the only way I will eat them is if I can find them fresh. Dried beans are too much effort and canned beans are for salsas!

About a year ago, I had the opportunity to do a cooking class at one of the best restaurants in Durham - Nana's. The recipe that I enjoyed learning most was one that highlighted butter beans. I couldn't wait to get home and try my own version. Unfortunately, butter beans were not in season when I got around to trying the recipe, so I had to wait until this summer to try it again. The biggest challenge was to document amounts, as the chef at Nana's did not have any sort of measuring utensil in his kitchen.

There are several elements that make this recipe delicious - bouquet garni, broth and mirepoix. Ok, I promise I am still speaking English...well sort of!

Bouquet Garni

Bouquet garni is a french term for "garnished bouquet," in other terms a bouquet of herbs. This is used to flavor sauces, soups and stews and is very easy to put together. Take string and tie it around a bunch of fresh herbs - any kinds available.

Stewed Butter Beans | www.kettlercuisine.com

Mirepoix

We all know what broth is, but you might be asking what mirepoix is. Another term I learned at the cooking class, that is also referred to the "Holy Trinity" or "Soffritto." Mirepoix is a combination of equal parts celery, onion and carrot. This is the base of most soups, sauces and broths. These three boring vegetables come together to create a fantastic flavor base for many recipes. For all the soups and sauces that I make, I always start with mirepoix now.

Stewed Butter Beans | www.kettlercuisine.com
Mirepoix - equal parts chopped carrots, celery and onion.

Butter Beans

Yields: 4 cups

1 tablespoon butter
1 tablespoon olive oil
1 cup carrots, chopped
1 cup celery, chopped
1 cup onion, chopped
2 cloves garlic, finely chopped
1 bouquet garni (I used basil, thyme, oregano and bay leaves)
   mixture of fresh herbs (can use a combination of basil, chives, oregano, parsley, bay  
   leaves, thyme, rosemary, sage)
   butcher's string
4 cups chicken broth (use vegetable broth for vegetarian version)
1 quart fresh shelled butter beans
1 teaspoon salt
1/2 teaspoon pepper

In a large sauce pot, heat the butter and oil over medium-high heat. Toss in the chopped onion, celery and carrot and stir to coat with the butter/oil mixture. Cook this for about 5-7 minutes just until the vegetables start to become soft.

Stewed Butter Beans | www.kettlercuisine.com

Prepare your bouquet garni while the vegetables are cooking. Tie the butcher's string around a bunch of fresh herbs.

Add the garlic to the pot and cook for another 2 minutes.

Add the broth, bouquet garni and butter beans to the pot. Gently stir to combine and add salt and pepper. Bring the mixture to a boil, lower the heat to a simmer and cover the pot. Cook on low, covered for 45 minutes. Check the beans, stir and continue to cook for an additional 15-20 minutes if they are not done. Be careful not to overcook the beans as they will lose flavor and become too mushy. Once you are able to easily mash the beans with a fork, they are done.

Stewed Butter Beans | www.kettlercuisine.comStewed Butter Beans | www.kettlercuisine.com

I like to serve my beans on top of a baked sweet potato or fresh spinach. You can leave the beans in the broth for more of a soup or drain some of the broth out. I like to reserve the broth to drink or use for other uses like cooking rice, couscous or noodles.

Sunday, July 8, 2012

Grilled Jalapeño Poppers

It was a great celebration - friends, food and fireworks for the July 4th holiday this year. We decided to take it easy since it was a work night. We invited some friends to come over to grill and have a few drinks. Everyone brought something and was hard at work prepping for our grill feast before the fireworks!

Grilled Jalapeño Poppers | www.kettlercuisine.com

With a trip to the Farmer's Market earlier in the week, my friend Virginia and I had gathered all of the sides and fixin's (as we say in the South) for our 4th of July feast!

Grilled Jalapeño Poppers | www.kettlercuisine.com

We started the evening with a few appetizers, as any party should. I made guacamole and put out fresh salsa. Virginia made Deviled Eggs that were scarfed down in about 2.5 minutes!  

Grilled Jalapeño Poppers | www.kettlercuisine.com

We had fresh cherry tomatoes with olive oil and balsamic vinegar, grilled vegetables and corn from the Farmer's Market.

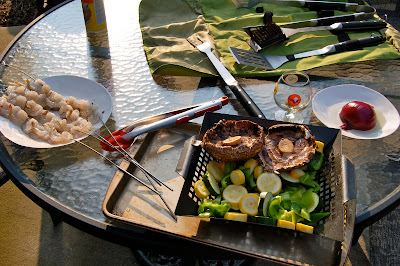
The boys decided to throw a few steaks on the grill to go along with all of the vegetables. The five boys put their head together and incorporated a few new tips for the steaks. First they scored the steaks (to prevent the ends of the sirloins from curling), then they used half an onion to rub the grill grate for extra flavor and to apply oil to the grates. One of the guys even picked some basil from our garden to throw on his steak.

Grilled Jalapeño Poppers | www.kettlercuisine.com

With all of the grilling going on, we thought it would be the perfect day to bust out our jalapeño poppers! I know what you are thinking, deep fried. But not in this house!!

This is a delicious and healthy version using a whole jalapeño, cheese and bacon (which you can leave off to make vegetarian). Everything can be prepped ahead of time, and thrown on the grill with other things. We had both grills going on this day, so I squeezed them in between the corn and mushrooms.

Grilled Jalapeño Poppers | www.kettlercuisine.com

Grilled Jalapeño Poppers

Yields: 12 poppers
Prep Time: 20 minutes
Cook Time: 10-15 minutes

12 whole 
jalapeños
4 ounces cream cheese, slightly softened
1 cup favorite cheese, shredded (I use a sharp Vermont cheddar or Gruyere)
12 slices of bacon (or prosciutto if preferred) (can leave this off if vegetarian)
toothpicks
* optional ingredients for the filling are chives, garlic, pimentos or red pepper finely chopped, cooked sausage, etc. The possibilities are endless!

First, soak the wooden toothpicks in water for at least 30 minutes before grilling. Heat your grill to medium-high heat.


Cut the jalapeños in half lengthwise and scrape out the membrane and seeds with a small spoon. If you would like a hotter popper, leave some of the seeds in the jalapeno. I usually do half and half for a variety. Make sure to keep the halves for each jalapeno together so they are matched up.

Grilled Jalapeño Poppers | www.kettlercuisine.com

In a medium sized bowl, mix the cream cheese and shredded cheese together until well blended. Here is where you can add in any additional ingredients that you wish for the filling.

With a small spoon, fill one half of the jalapeño with the cheese filling until it is slightly overflowing, but can still place the other half of the jalapeño on top so they connect. Fill all jalapeños with the filling. Pull out your bacon and slice the pieces in half. (Note, it is easier to work with chilled bacon). If your bacon is really thin, use a whole piece. You can also leave off the bacon for a vegetarian version, but still use a toothpick to keep the jalapeño closed. Wrap a half a piece of bacon around the popper and use a toothpick to secure it. Repeat for all jalapeños.

Grilled Jalapeño Poppers | www.kettlercuisine.com

Place poppers on a piece of heavy-duty aluminum foil, that has been sprayed with cooking spray or olive oil. Grill for about 10-15 minutes, depending on your grill**. You want the bacon to be cooked and crisp and the peppers to have a good grill marks. This works best on a charcoal grill.

**You can also bake these at 400F for 15-20 minutes.